
For the record, I’m not a drunk; I just great ideas, and act upon them, when I’ve had a few sips of Grampa’s sarsaparilla. Some people get slutty, some people get angry, I just get inventive and want to build things and tackle projects.
I missed out on drinking at hunting camp – but I am a hearty believer that shooting and drinking don’t mix very well. However, drinking and working on guns is friggin brilliant!
I started my project with a purchase – someone on Craigslist was clearing out a bunch of stuff. I swapped an old Stevens 12 gauge break-open with a stuck auto-ejector (stick along with you to ram down the barrel after you shot anything) to Mike Oscar. In return, I got a disassembled Mosin Nagant. I got the way better end of the deal, don’t tell him. After I put it together, I fired it once or twice, then it stayed with my brother when i moved, then it got swapped back and forth a few times, and finally, I ended up with it at my house, I’m not sure how. The front sight was missing, from who knows where, and the upper barrel wood is longer than the lower barrel wood, probably because they’re from two different guns. Can she shoot? Not sure yet!
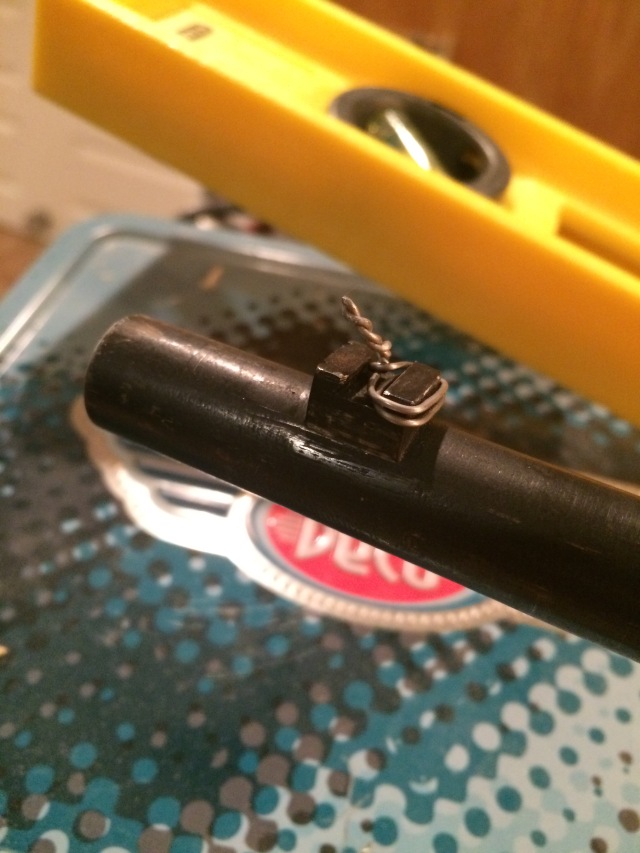
The missing front sight is annoying, so I stuck some safety wire over it, just to go shoot with it – I never got a chance, the range we went to insisted on brass ammo, and I only have old steel ammo for my gun. I have been looking at bent bolts to add a scope mount, and went so far as to pull the bolt out and set it in my vise, getting ready to make my own bent bolt, a job I wasn’t excited about.
Searching for tents on Craisgslist last week, I saw a guy who was selling a tent peg hammer (because the back of a hatchet is so 80s), along with a bunch of odds and ends of junk. Buried in the middle, was a couple scope rings, two 10/22 mags, and a Mosin Nagant scope mount, that replaced the front sight! Mike Oscar had mentioned one from seeing a video (https://www.youtube.com/watch?v=E-dE_tknOgk), but I wasn’t able to find one. Now this guy has one for sale!

So for $25, I picked up all the loot you see here. It was a good haul! In the plastic bag is my treasure, the Mosin mount! I later found one for $10 on Amazon. But oh well, this one is in my hot little hands, so it’s going on my smoke pole.

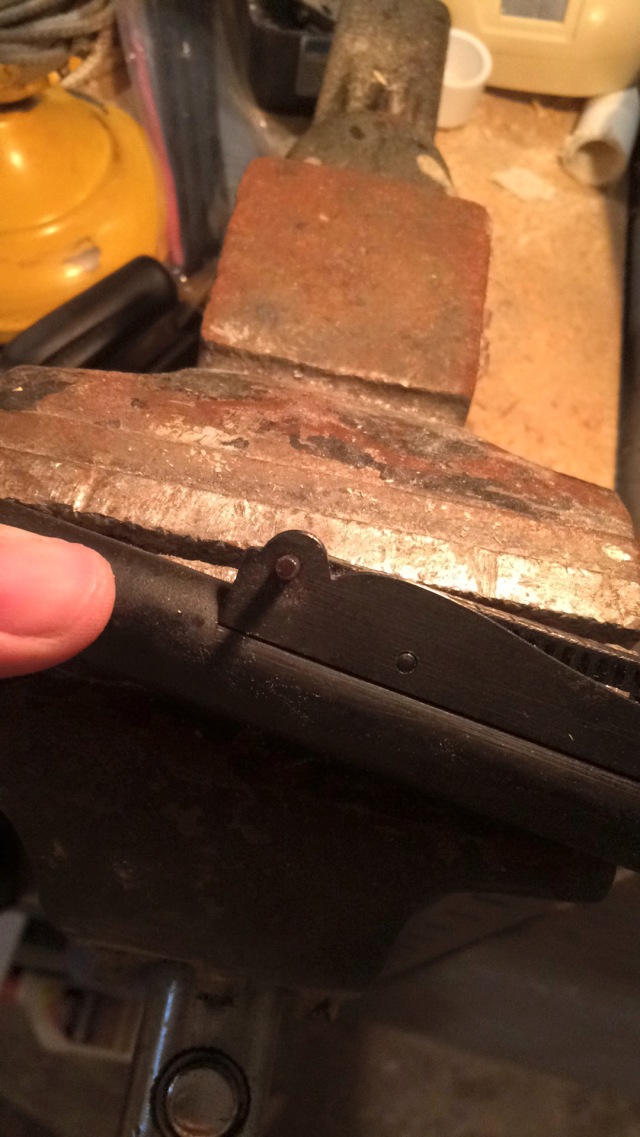
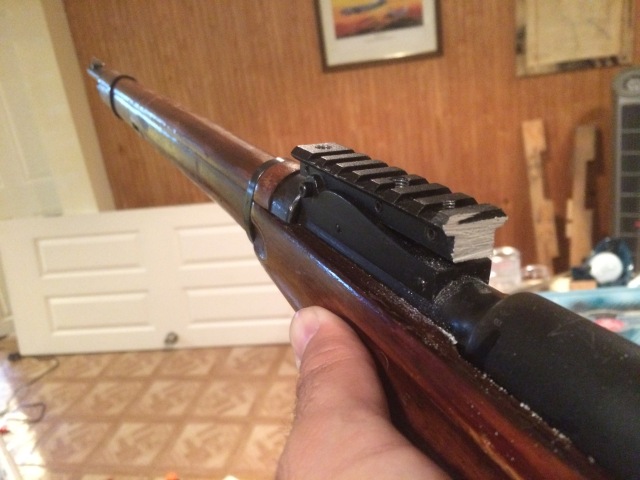
The first step was disassembly. That’s a pretty easy step; Mosins weren’t made for brain surgeons. Once the barrel assemble was stripped away from the wood, it was time to get hammering. At the front of the sight ramp is a pin -get a nice punch, a hammer, and carefully tap it out, making sure to cushion the rather than put it right on steel and smack it around like it owes you money.
Then get another sip of Tullamore Dew.
At this point, I noticed another problem – the pin that lines the trigger up was pretty loose. Whether a design issue or a ‘too-many-nazis’ issue, I spent a few minutes sifting through the sawdust below my vise before found it; but once I did, I used some electrical tape to hold it into place. 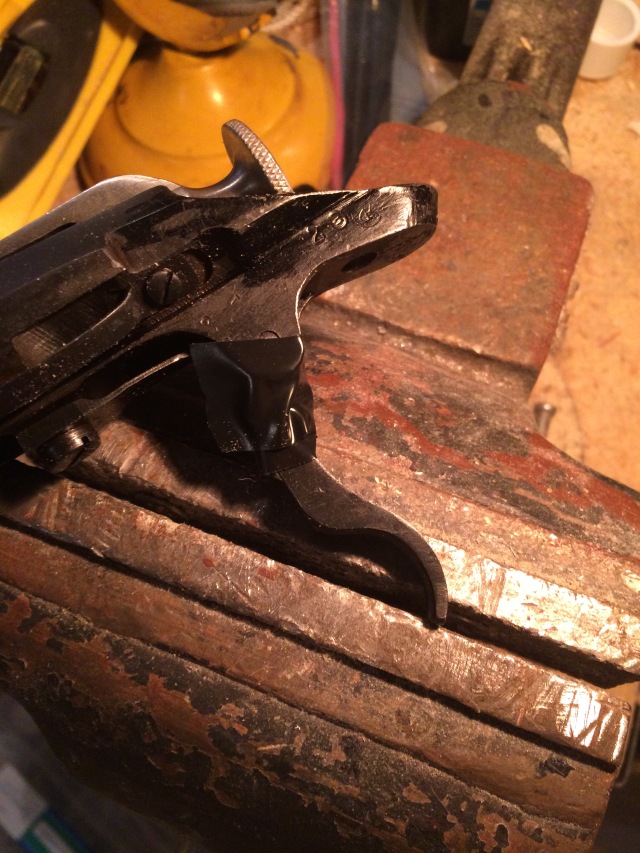
I put some tape on the side of the action to protect it from the anvil, then put a split in the tape so it could slide out. 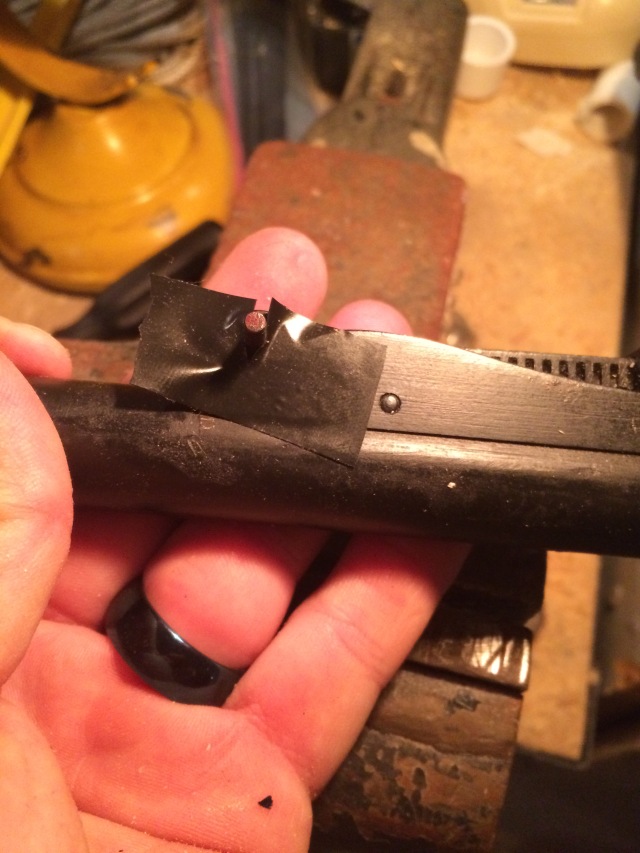
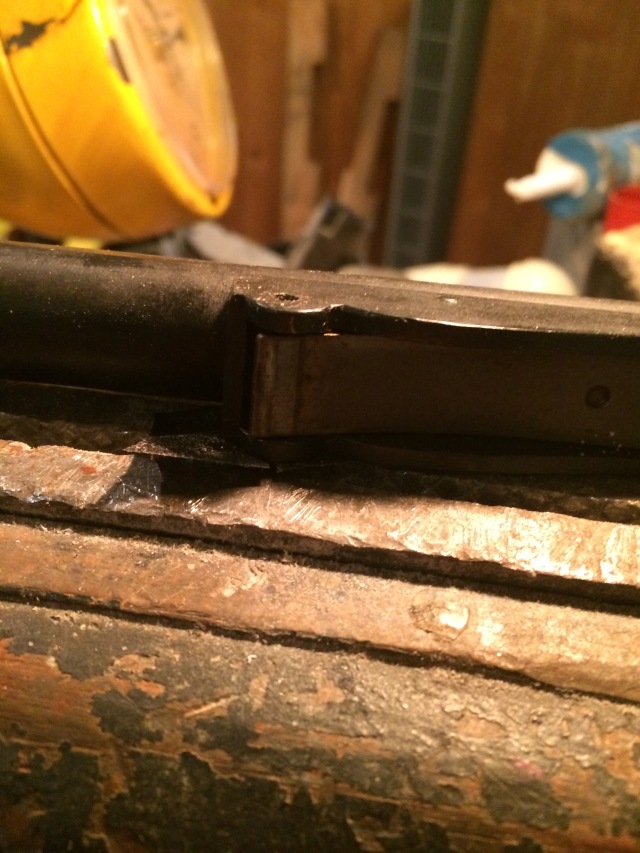
Once you flip the sight out, slide the spring forward and out. Now it’s time for the mount! Line it up as it looks – the bolt will go through the now empty pin hole, and the body of the mount will lie along the channel the sight used to lay in. There might be some sanding and grinding to make it a good fit, but I know you got this. You aren’t too far into the good stuff yet – I’ve only finished my first glass!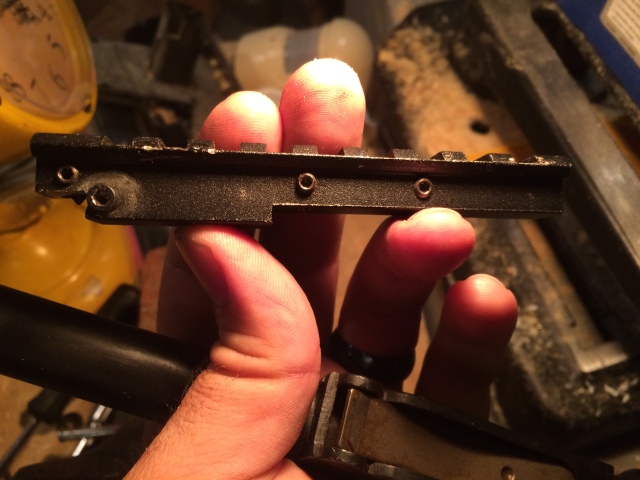
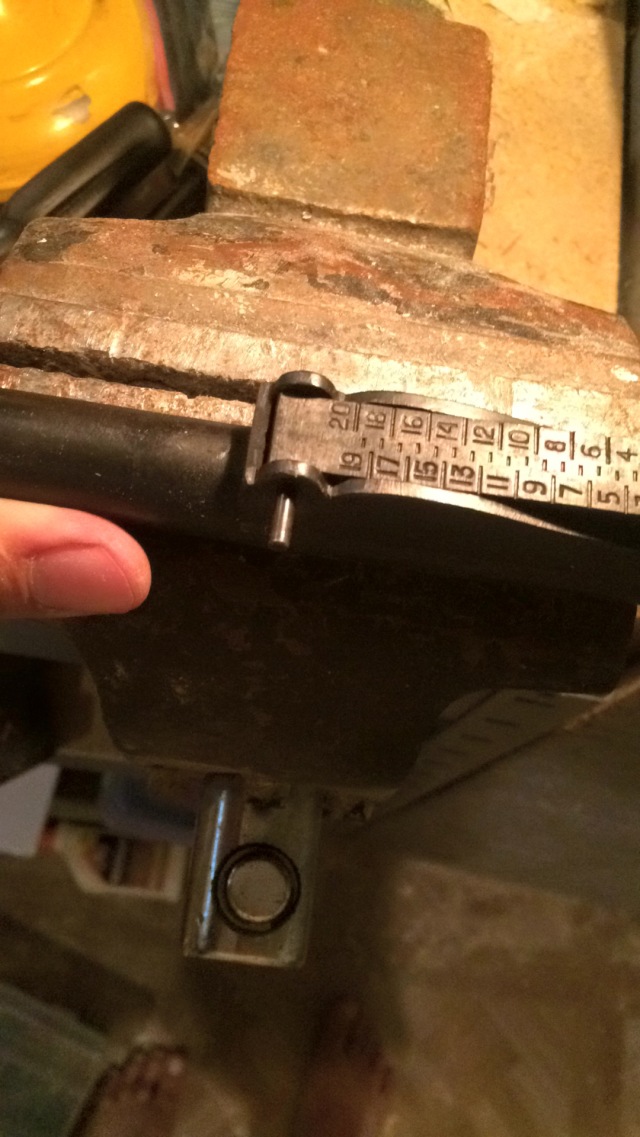
Once it’s in place, slide the bolt through from the left to the right, screw the nut on (4 mm wrench) and tighten it down. I put some lock-tite on there, because you can never be too sure.
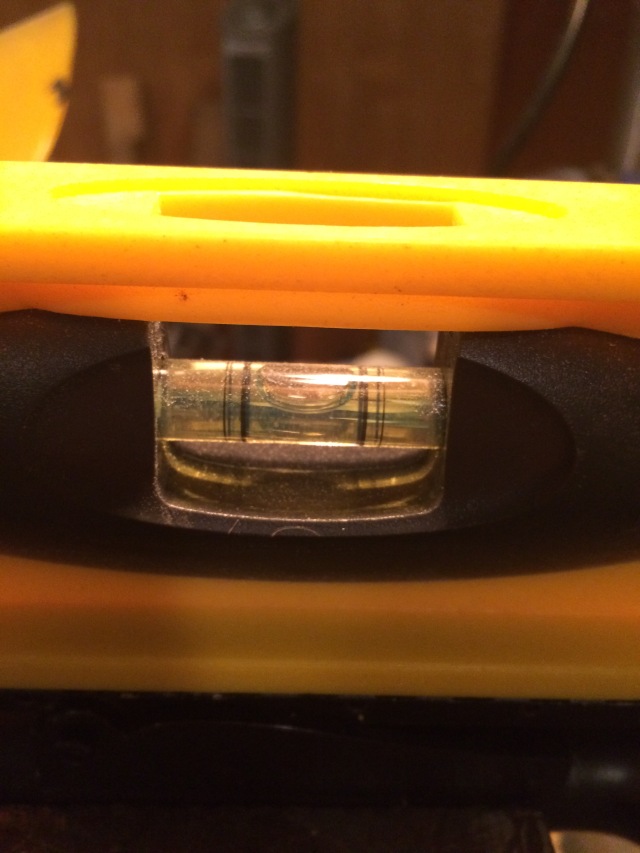
I thought I’d skip a few steps and save a few bullets by leveling things out ahead of time. I wrapped the gun in an old shirt, around the action where I was going to fit it into the vise. I then stuck my level on it to make sure it was parallel to the floor. Once I was sure the gun was level, I started adjusting the screws. I worked on the screw all the way to the rear first, and ran it down and checking with the level until it was level. I then ran the front screw down, making sure it was snug but not putting an undue amount of pressure on the front (it comes out in a weird spot, not really on the wood or the metal, so don’t get too crazy with it. Once that was in place and level checked again, I ran down the second screw from the back. Once I checked again, I tightened the set screws on the left side. And then, because I know how much luck I have, I checked again – sure enough, setting the set screws knocked it off.
After it was all done, I sat back and admired my work. Not my workshop, though, because that looks like a yard sale barfed on my work bench.

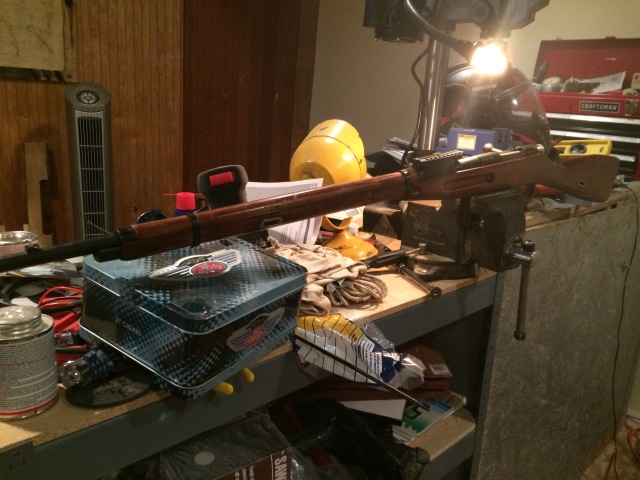
(The shirt is gone, this was just display purposes)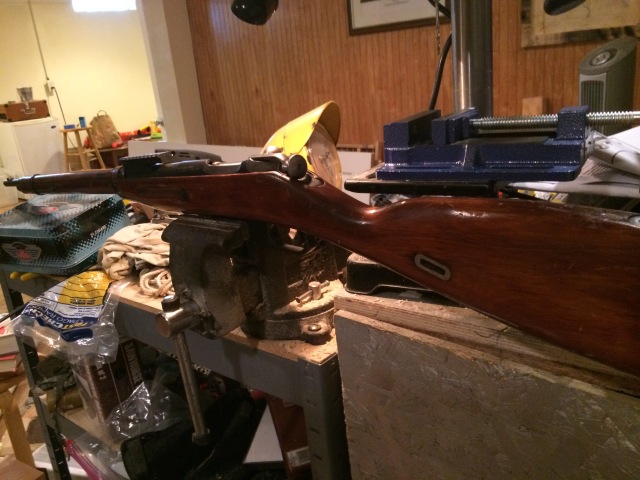
So then I mounted my scope. It didn’t work. It is a short base, so there are only a few scopes this will work with. Like, not the one I had. Because when I started trying out the rings I had purchased, the tall ones worked but put the crosshairs very low when I went for my natural cheek weld.
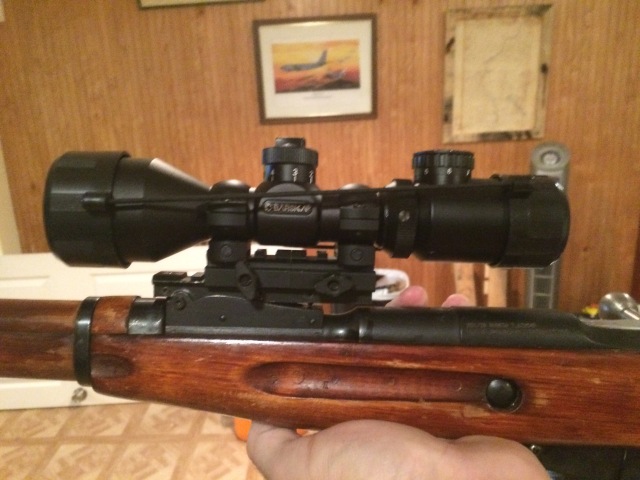
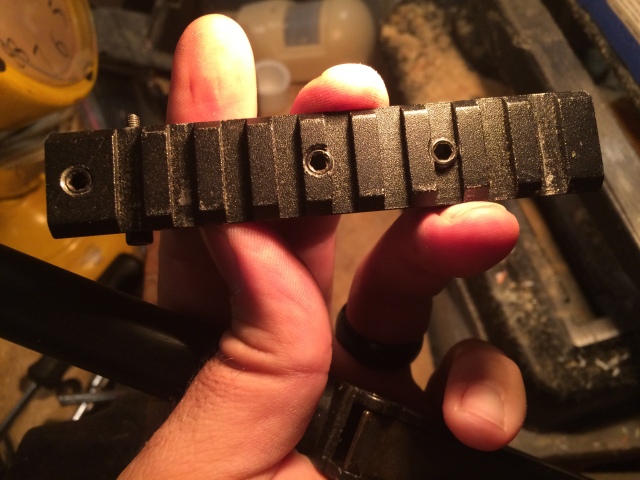
The low profile rings I had were the wrong size, so I ordered new ones. Once they came in, the eye piece was too big, and it wouldn’t allow the scope to sit on the mount. So, it was time to dig the Sawzall out again (now you know why I had checked to see how much a replacement was.) More shirt wrapping, more vise work, and I had a shorter mount that worked with my scope.
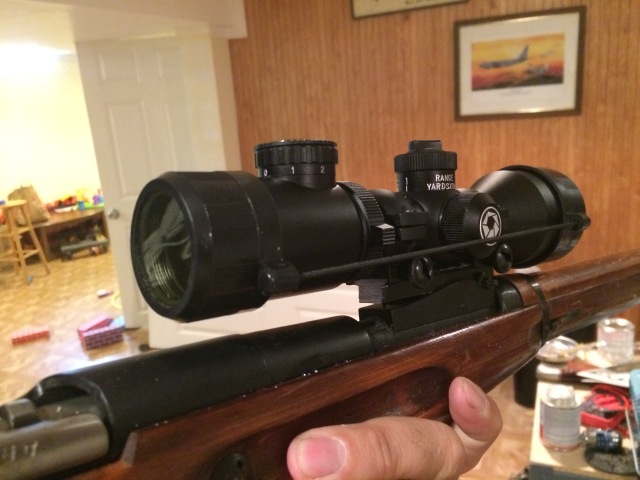
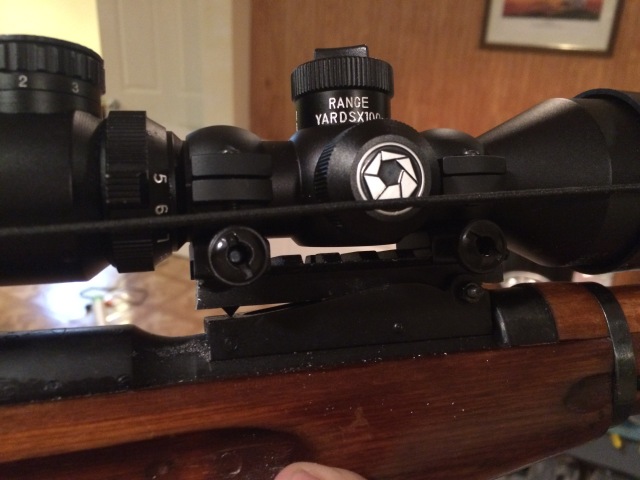

It’s off to the left a little, so there will be some adjustment. I’m not looking forward to a full day at the range sighting in this and my new 30.06, so I might invest in a laser bore sighter first.
Or borrow one from one of you. Anyone in southwest Michigan and have an afternoon free? I’ll bring the booze!
For afterwards, of course. I have some shelves I need to build.


It might be worth buying a bore sight.
LikeLike
Reblogged this on Rifleman III Journal.
LikeLike
Bore sighting will be easy. In fact, you may wish to re-bed (and get a front sight ramp), as sometimes the bedding on the old stuff goes sour, and accuracy becomes non-existent. I had an old shotgun once, and the bead sight was shot off in time. I cut a piece of wooden match stick, positioned it along the bore axis, using the bead hole as a “porting” (match stick just behind the hole), and taped it down. Maybe twice, due to weather, as I hunted in all weather, the stick came off, so a drop of glue, and tape over, again. Worked like a dream.
Here’s what you need to check. With the rifle empty, take a fresh round of ammunition. Put the buttstock on the floor, holding the muzzle to the sky/ceiling. Take the bullet, holding the brass, and see if the bullet projectile, freely enters the muzzle. If so, the rifle will need to be re-barrelled. If it does require a new barrel, ask the gunsmith to crown the new barrel at eleven degrees. Much of the old war era rifles, did some heavy duty firing that eroded bores. Primers were Berdan type and caustic. Being knocked around, bedding went, if it had any bedding to begin with.
Enjoy your rifle, best of luck safely hunting.
LikeLiked by 1 person
Looks like fun. I should have bought a barrel full of mosins when they were $75 a piece!
LikeLiked by 1 person
And SKSs when they were $100 apiece!
LikeLike